 Script Planner Assistant▸
 AI Apps
 AI News

Updream: Bilibili's AI 3D Video Previsualization Tool
Updream: Bilibili's AI 3D Video Previsualization ToolIntroduction
updream Previs (Previs Platform)
updream Previs is a feature inside updream, Bilibili's self-developed AI video product. It went live on August 17, 2026. It brings the visual previs workflow commonly used in the film and TV industry into the AI video canvas. The approach is: upload a scene reference image, the system generates a 3D white-model (greybox) scene, creators drag cameras and arrange character blocking inside the scene, record a white-model clip, then send it back to the canvas where video models such as Seedance, Kling, and Wan render the final footage.
It lets AI video creators control the camera the way they would in Blender: design the shot first, then generate the image. This reduces "card-drawing" (trial-and-error prompting) and saves a lot of money.
Core Features
Upload one scene image; the system parses depth, scale, and occlusion to generate an editable 3D white model in about 4–7 minutes. Up to 3 multi-angle reference images are supported.
For characters, you can add character white models and adjust name, color, body type, height, and basic pose. Press G to move and R to rotate to set position and orientation.
Cameras can be created with parameters such as lens model, focal length, aperture, and sensor size. Supports push-ins, lateral moves, follow rails, and keyframe-based camera motion editing. Multi-camera switching can be controlled on the timeline, with keyframes at the start and end of each segment, suitable for shot/reverse-shot and other multi-camera narratives.
After preview confirmation, you can record a 1280×720/30fps white-model video. It is automatically returned to the canvas after export and fed into a video model to generate the final footage. For character consistency, upload four character master images (front, side, back, and 45°) to generate a character white model, reuse it across previs shots and bind motion templates to ensure a consistent appearance across shots.
In addition, you can launch the Previs platform via an Agent node, letting AI reason about space, movement, and lighting in natural language, batch-generate multiple variations, and check physical plausibility.
Why Choose updream Previs
The hardest thing to control in AI video is space. Describing camera moves and blocking with text makes it difficult for models to understand coordinates, distance, orientation, and time in 3D space. The ControlNet paper also noted that text-to-video systems lack spatial anchoring, and that rough 3D white models are actually the right solution for spatial anchoring. White-model reference versions require fewer card draws than pure prompt versions and produce more stable results.
Traditional white-model workflows require learning Blender or building ComfyUI, which is a steep learning curve. Previs condenses the workflow into a single console, so you can get started without any modeling experience. In real-world testing, a 60-second piece using Previs typically produced usable assets with almost no card draws, and some users reported saving hundreds of credits per shot.
It also works with updream's Skill workflow: Skill handles narrative, while Previs handles space and camera work, covering the chain from script to final footage.
Use Cases
In AI short-form dramas and manhua dramas, group blocking, sightlines, and multi-camera switching are the hardest parts to do with pure prompts. Previs locks down blocking and camera moves, letting you finish a 10-minute AI short-form drama episode in three days.
For film storyboarding, combine Previs with the Skill workflow to put Previs into the canvas, upload real scene photos to generate 3D white models, control camera placement at parameter level, and export storyboard video for Seedance 2.5 to render.
Complex camera-move replication also has real-world cases, such as the Copacabana long follow shot from "Goodfellas" and the café shot/reverse-shot from "Heat." The white-model reference version performs better than the pure-prompt version in trajectory continuity and switching timing.
For commercial ads and brand short films where product display angles and camera rhythm must be controlled, Previs ensures composition and camera moves match the director's intent. In pre-production previews, white-model video can also be shown to clients and the team to communicate shot plans, reducing communication costs and post-production rework.
How to Use
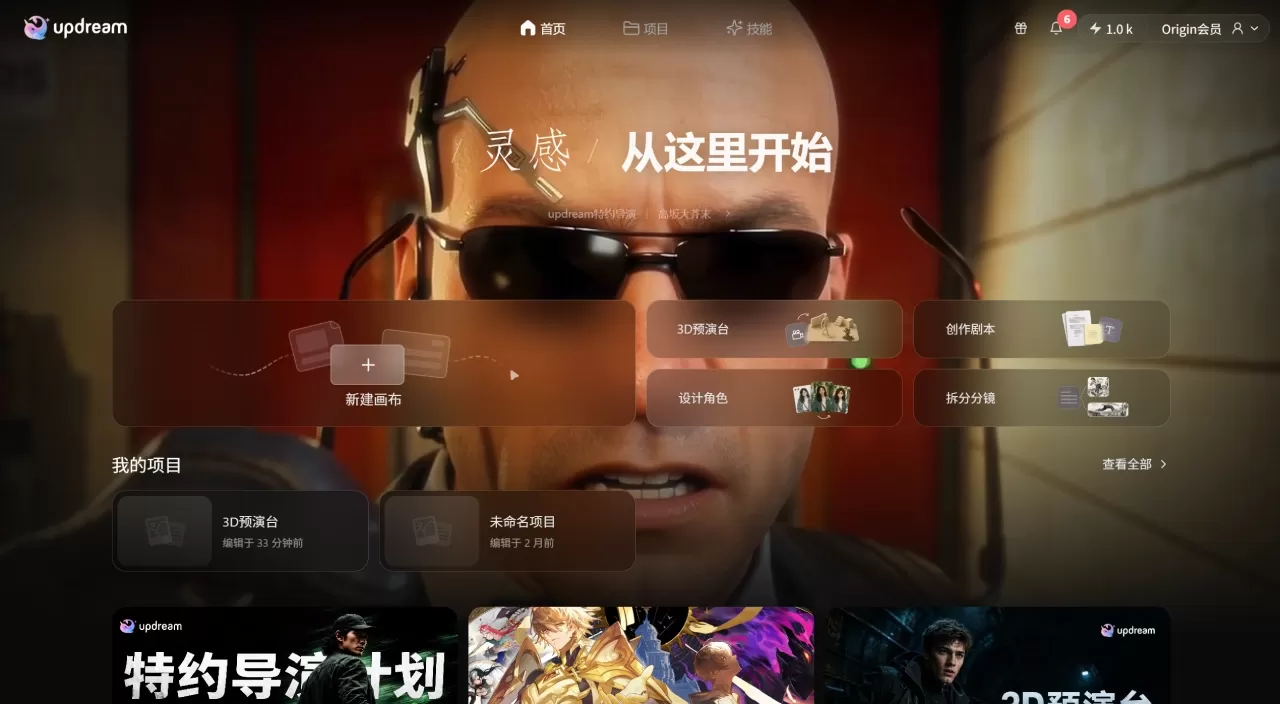
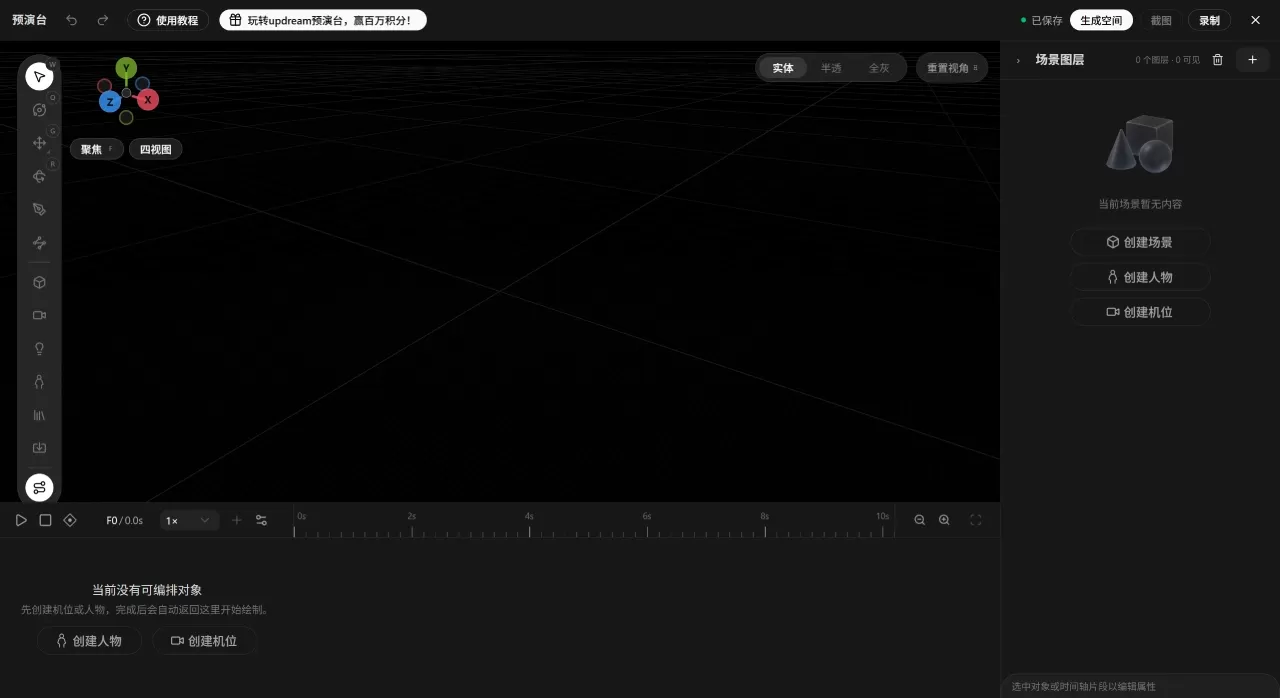
Upload a reference image: Log in to the updream official site and click "3D Previs" on the homepage to enter the Previs platform. Click "Generate Space" to upload a scene reference image. The first image should be front-facing, with no distortion and the subject in the center. Oblique or overhead angles can cause the white model to clip through walls or have floating objects.
Generate the white model: Click "Start Generating" and wait about 4–7 minutes. The system will generate an editable white model with axis lines. If the generated white model includes an unwanted roof, check "Remove Top Structure" and regenerate.
Add characters and set blocking: Click "Add Character" on the right to place character white models, and adjust height, body type, and basic pose in the scene layers panel. Select a character and press G to move, R to rotate, and set motion paths via dragging, line drawing, or keyframes.
Design cameras: Create a camera and set focal length and aperture. For wide shots, 24mm/f5.6 works well; for medium and close shots, 50mm/f4. Draw camera motion paths; the preview frame in the top-right shows the current view.
Record and generate final footage: After previewing and confirming the staging, click Record in the top-right; the white-model video will be automatically added to the canvas. Use the white-model video as a reference for the video model, and write only prompts for style, lighting, character costume, etc.—camera work and blocking are constrained by the white-model video.
FAQ
Q1: Do I need to know Blender?
No. Previs is designed for people with zero modeling experience—you can generate a white model just by uploading a reference image.
Q2: Why does a 3D white model improve camera-move stability?
The white model provides spatial anchors: scene structure is visible, character start and end points are defined, camera paths can be drawn, and switch points can be placed on the timeline. Text descriptions alone lack the precision to convey this information; the white model transmits it accurately.
Q3: Is a more detailed white model always better?
No. At the white-model stage, only structure matters—color and materials do not. Textures are repainted by the downstream video model based on prompts. Adjusting textures inside Previs is a waste of time.
Q4: How do I keep AI characters consistent across shots?
Upload four master images of the same character: front half-body, side full-body, back standing pose, and 45° close-up, to generate a character white model. Drag it from the asset library to reuse it during previs, and enable the model's "Character Consistency: High" setting.
Q5: How long does it take to generate a white-model video?
A scene white model takes about 4–7 minutes. Character blocking and camera setup time depends on scene complexity, and recording is real-time. A 60-second piece takes roughly 30–60 minutes from building the white model to exporting.
Q6: Can Previs completely eliminate randomness?
No. The white model primarily constrains space and motion. Character details, materials, naturalness of action, and complex physical interactions still depend on the model itself.
Comparison with LibTV Director's Console
| Comparison Item | updream Previs | LibTV Director's Console |
|---|---|---|
| What it is | A feature inside updream. Upload a scene image to generate a 3D white model, place characters and drag the camera inside it, record a white-model clip and hand it to the model to render. Plan the shot first, then generate the image. | A 3D composition tool inside LibTV that opens with a double-click on the canvas. It includes humanoid block figures and basic geometry, letting you place items and adjust camera positions directly, then screenshot back to the canvas as a reference. |
| How to get started | Upload one scene reference image; the system automatically generates the white model in 4–7 minutes. | Open an empty 3D canvas and manually add characters and props. |
| Character placement | Add character white models; adjust height, body type, and pose. Press G to move, R to rotate. | Built-in humanoid block figures; press V to move, R to rotate, S to scale. |
| Character consistency | Upload four character master images (front, side, back, 45°) to generate a character white model, and enable Character Consistency: High. | Good consistency in multi-character scenes. In one test with a five-person meeting, character positions remained stable after switching cameras. |
| Camera adjustment | Create cameras, set focal length, aperture, and sensor size. Draw rails or place keyframes. Switch multi-camera setups on the timeline. Record 1280×720/30fps white-model video. | Back to the canvas. |
| Reference image requirements | The first one should be front-facing, undistorted, with the subject centered. Oblique or top-down angles can easily cause white models to clip through walls or float in mid-air. Unneeded rooftops can be removed. | Supports panoramic image import — you can convert ordinary scene images into 720° panoramas before inserting them for preview. |
| Workflow | Upload image → Generate white model → Arrange staging → Set camera → Record white model → Hand off to modeling for rendering. | Open 3D canvas → Place characters and props → Adjust camera → Screenshot back to canvas. |
| Price | Included in the updream platform, no separate pricing. The advantage is reducing the "lottery draw" effect — traditionally, drawing 3 versions per shot costs about 210 yuan, and the preview stage can eliminate wasted generations. | Included in LibTV membership; the monthly plan is 59 yuan for 1,500 credits. For annual members, the generation cost can be as low as 0.39 yuan/second. |
| Best suited for | Those who have clear scene reference images on hand, want to quickly generate white models and plan shots, and are willing to participate in directing decisions themselves. | Those used to building spaces from scratch, or who frequently need to stage multi-character blocking. |
| Core difference | The starting point is a reference image; AI helps generate the white model, which relies heavily on reference image quality. | The starting point is a blank canvas; you arrange the space yourself, which depends more on your own spatial judgment. |
| Limitations | Cannot replace professional 3D software; complex physical interactions and fine materials are still out of reach. | Same here — it cannot replace professional 3D software, with limits on complex physical interactions and fine materials. |
Related information: