
 Script Planner Assistant▸
 AI Apps
 AI News

Windrecorder: An Open-Source Screen Recording and Search Tool
Windrecorder: An Open-Source Screen Recording and Search ToolIntroduction
Windrecorder is an open-source screen recording and retrieval tool that can replace Rewind.ai or Copilot Recall, helping users search for memory cues. It records screen content to enable memory search, supports queries by OCR text or visual descriptions, and provides activity statistics and other features. All functionality runs locally, with no internet or data uploads required, giving users full control over their data.
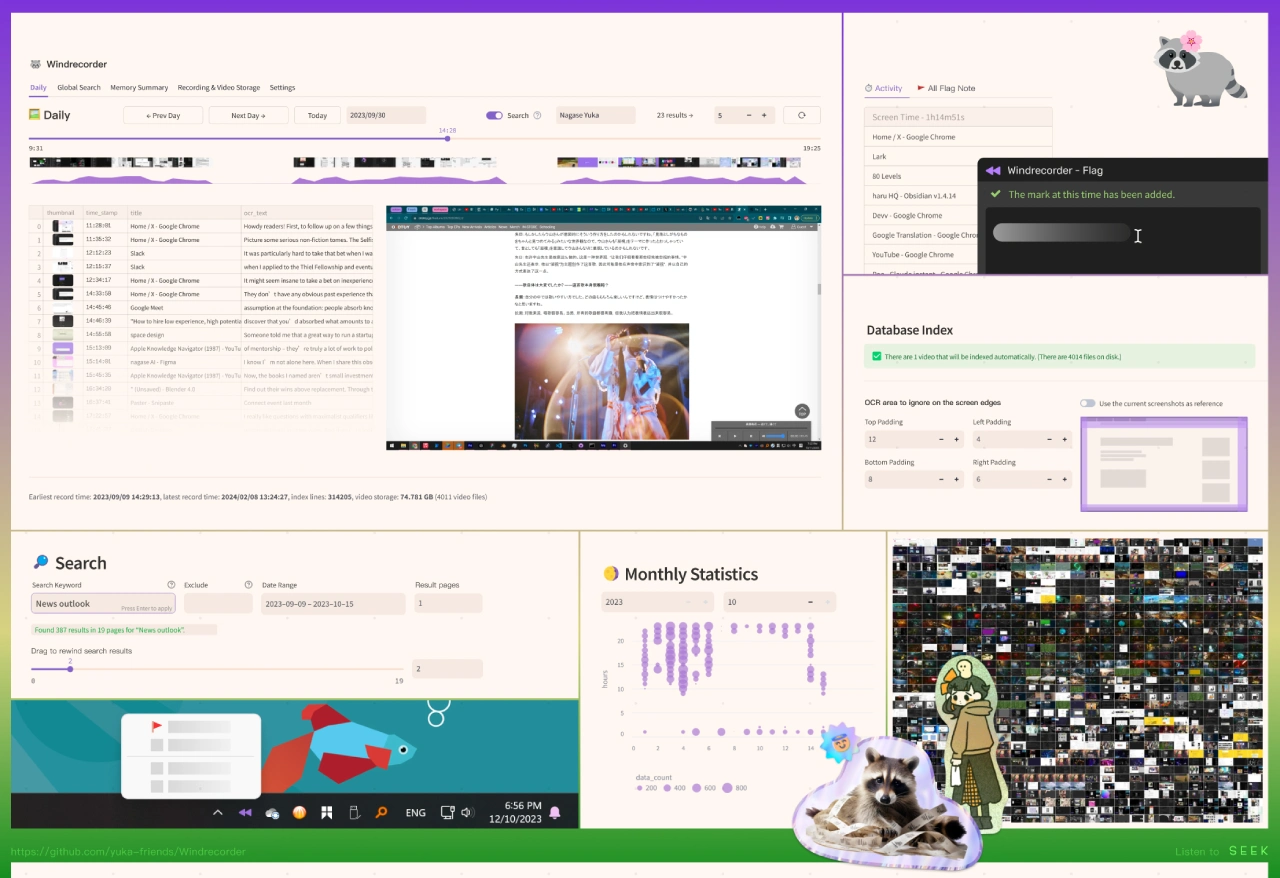
Windrecorder Main Features
Recording Capability: Steadily and continuously record multiple or a single monitor, or only the foreground active window, with small file size and low system resource usage. It also supports real-time rewind of previous screens.
Smart Indexing: Only index frames with changes, recording OCR text, page titles, browser links, and other information into the database. Supports custom skip conditions, such as window titles, process names, included text, and screen idle duration. When the computer is not in use, it automatically maintains the database, cleans, and compresses video files.
Query & Interface: Comes with a complete webui interface for rewind browsing, and supports OCR/image semantic queries.
Data Summaries: Provides activity statistics, word clouds, timelines, light boxes, scatter plots, and other data summaries, and supports AI (language model)-based tag summarization.
Multi-language Support: Currently built-in with Simplified Chinese, English, and 日本語. Contributions of additional language translations are welcome to improve the copy quality.
OCR Engines: In addition to Windows' built-in recognition capabilities, it supports multiple third-party OCR engines such as Rapid OCR, WeChat OCR, and Tesseract OCR.
How Windrecorder Works
Windrecorder offers two recording modes.
Automatic Flexible Screenshot: After recording starts, a screenshot is taken and recognized every 3 seconds (default), and indexed when content or text changes, enabling real-time rewind. At the same time, past screenshots are automatically converted to video every 15 minutes. This mode uses low system resources and is suitable for most users.
Direct Video Recording via FFmpeg: After recording starts, 15-minute video segments are recorded continuously, and indexing is performed on each segment after recording completes (data queries may have a 15-minute delay). This mode uses moderate system resources and can record computer activity more smoothly and completely.
When the screen shows no changes, the window title or screen content is in the filter list, or the computer enters lock screen, recording automatically pauses and idle-time maintenance is performed (video compression and cleanup, image embedding recognition, etc.), then resumes when the user starts operating the computer.
Windrecorder Use Cases
Work Records: Helps users record their work process, making it easy to look up key information later.
Study Assistance: Records screen content during study sessions for easy review and recap.
Life Logging: Records important information from daily life, such as movie subtitles, web content, etc.
Windrecorder Platforms & Dependencies
Platform & Language: Windows-based, developed with Python.
Runtime Dependencies: Requires installation and configuration of FFmpeg, Python, and Git.
OCR Engines (Optional): Supports Windows built-in OCR, as well as third-party engines such as Rapid OCR, WeChat OCR, and Tesseract OCR, which can improve recognition results for multiple languages including Chinese and English.
Windrecorder Installation & Usage
Installation Steps
Download ffmpeg (file name: ffmpeg - master - latest - win64 - gpl - shared.zip), and extract all files from the bin directory (excluding the bin directory itself) to C:\Windows\System32 (or any other directory in PATH).
Install Git, just click Next with the default settings.
Install Python, making sure to check "Add python.exe to PATH" during installation. Note that Python 3.12 is not currently supported; the Python 3.11 version pointed to by the above link is recommended.
In File Explorer, navigate to the directory where you want to install Windrecorder (a partition with sufficient space is recommended), and download the application via the git clone link command in the terminal. In the folder where you want to install it, type cmd in the address bar and press Enter, then paste the above command in the terminal to execute.
Open install_update.bat in the directory to install dependencies and configure the application. If everything goes well, you can start using it!
Usage
Access features via the system tray right-click menu.
Enable auto-start at boot in the WebUI for effortless recording.
Windrecorder GitHub: https://github.com/yuka-friends/Windrecorder