 Script Planner Assistant▸
 AI Apps
 AI News
iFlytek Xingchen Agent Platform: Tutorial for Building Workflow Agents
小编 ·

iFlytek Xingchen Agent Platform: Tutorial for Building Workflow Agents
iFlytek Starfire Agent automates business scenario processing by orchestrating multiple task nodes into coherent workflows. The nodes cover stages such as data input, processing, and output, building efficient and flexible workflows. Users can publish their agents to the Xinghuo APP/web version, WeChat Official Accounts, or integrate them into their business via API. The following tutorial guide uses a Q&A agent as an example to introduce the process of creating a simple workflow:
I. Enter the Creation Interface
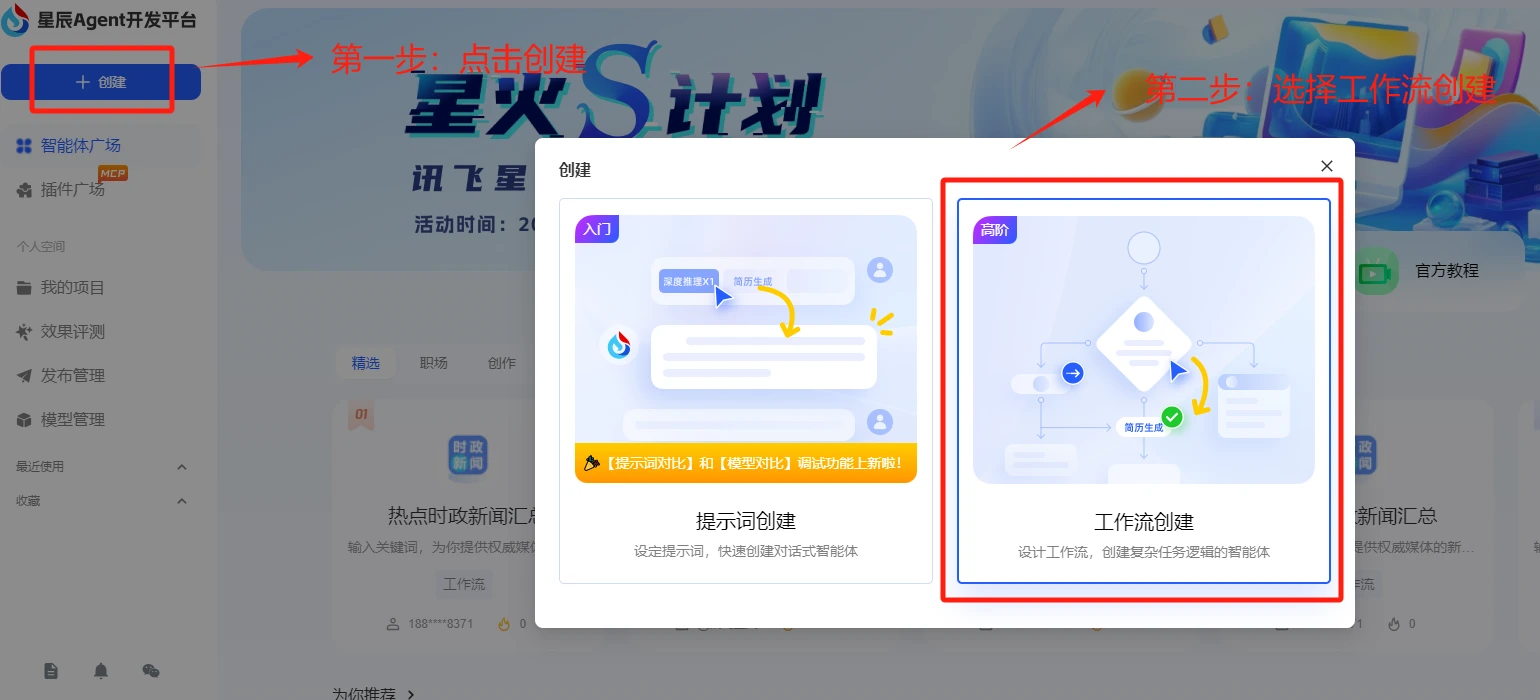
Log in to the iFlytek Starfire Agent development platform (https://agent.xfyun.cn), click the [Create] button in the upper left corner to enter the creation interface. Then click [Workflow Creation] on the right side to enter the workflow agent orchestration interface.
II. Choose the Creation Method
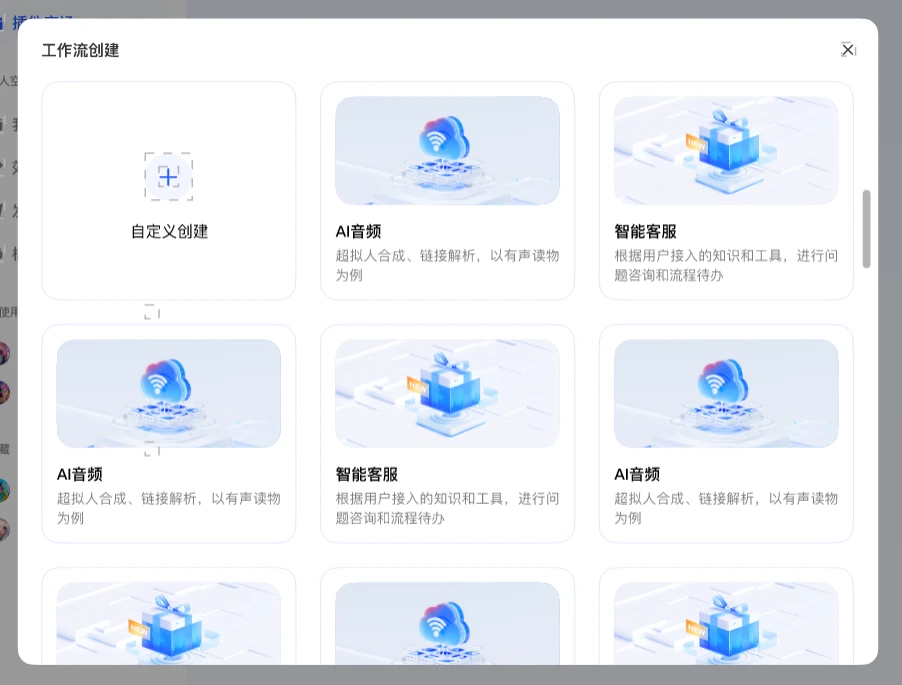
In the pop-up creation interface, you can choose the workflow creation method, which mainly includes the following two options:
Custom Creation: Provides a blank canvas where you can freely create a new agent based on your needs.
Template Creation: Provides an initial workflow for a specific theme, allowing you to reference and modify or extend existing workflows.
III. Add Nodes
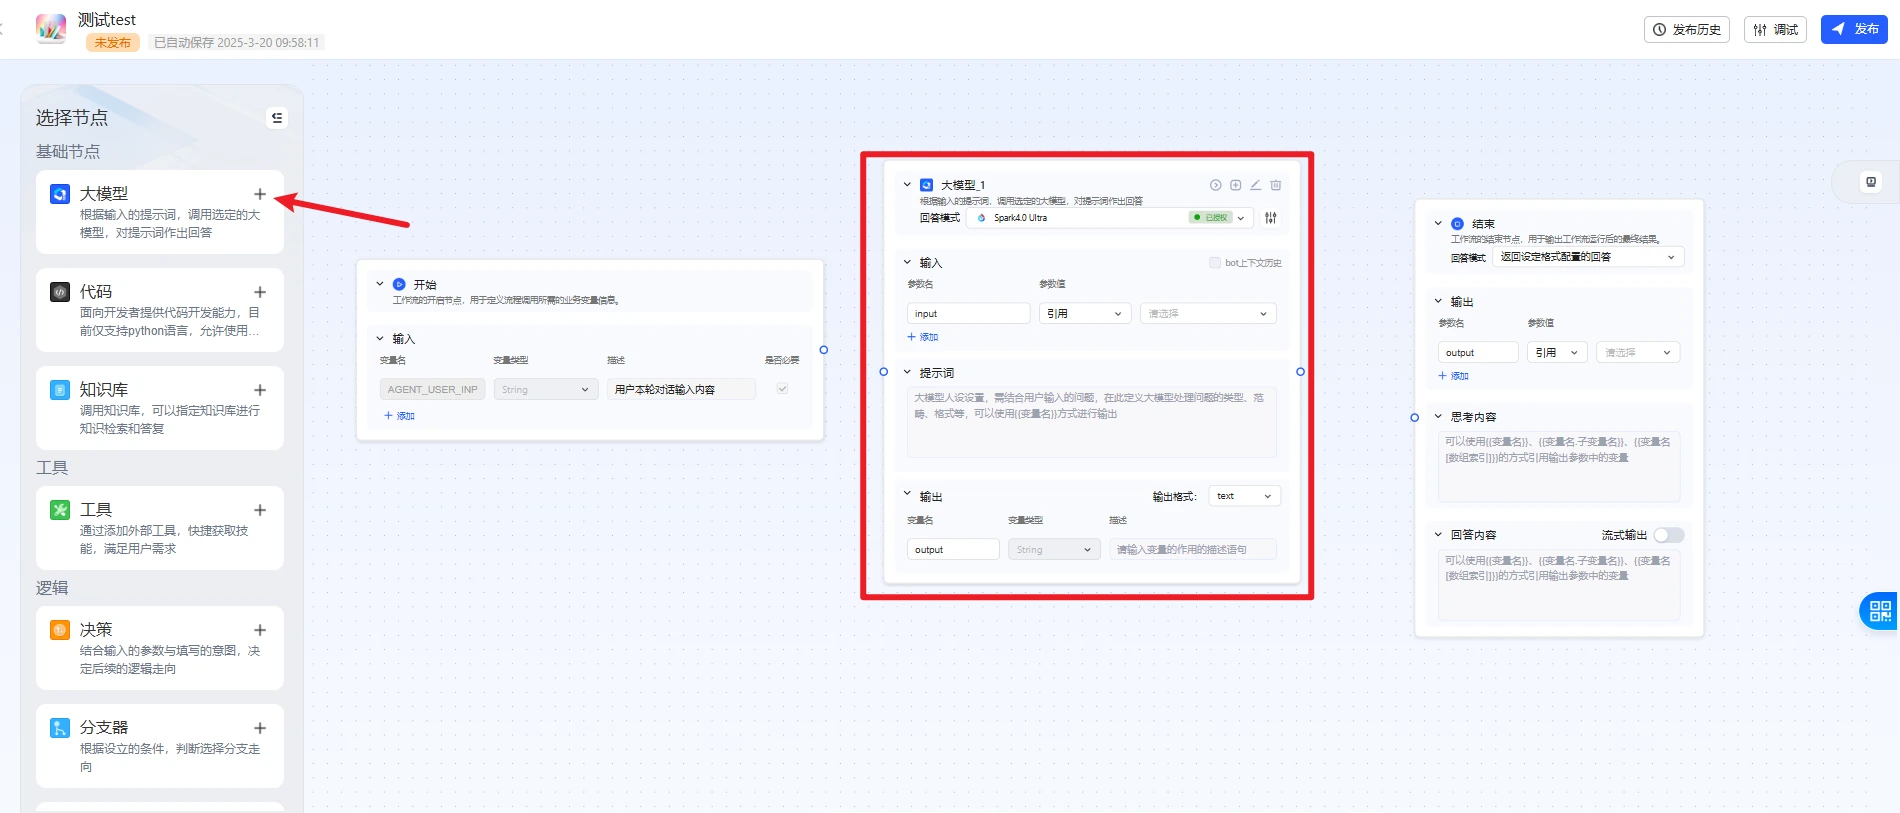
After selecting the creation method, enter the workflow canvas. Nodes are the basic building elements of a workflow, with each node representing a specific operation or task. A Start node and an End node are added to the canvas by default. You can add nodes by clicking on the node list on the left side as needed to build a complete workflow. Currently, the platform provides various types of nodes, such as large models, code, decisions, and knowledge bases.
Taking a Q&A agent as an example, if you want to implement a dialogue function, you can add a large model node. During the process of adding a node, you need to clearly define the input and output content of that node.
IV. Connect Nodes
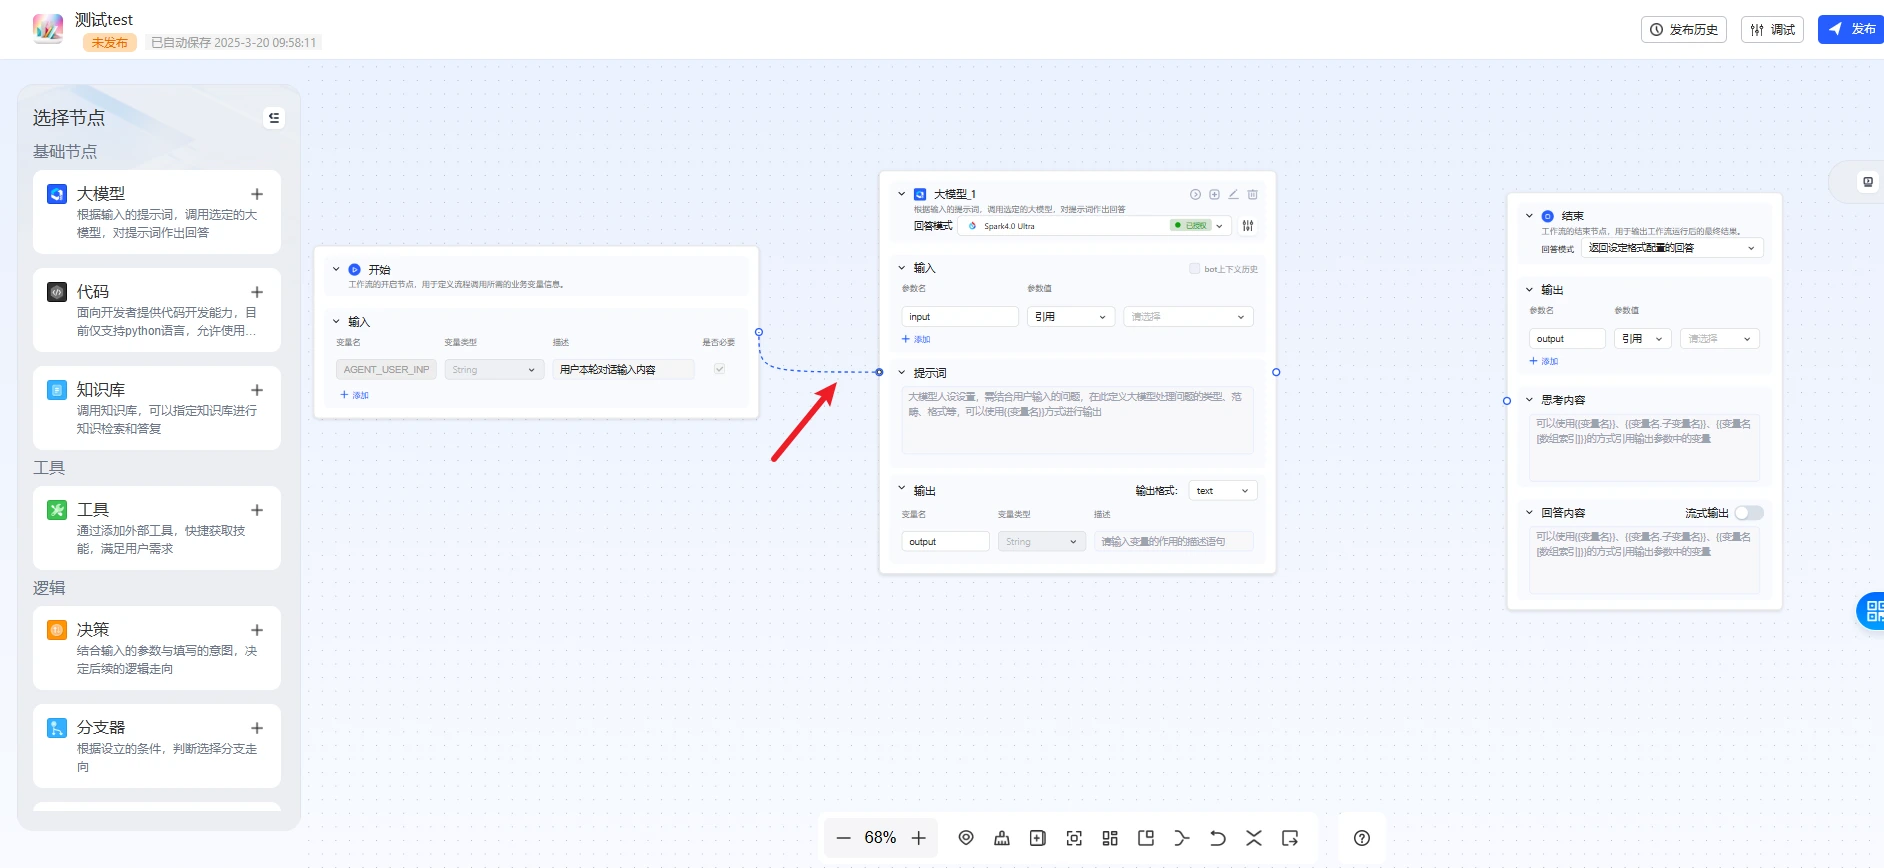
After adding nodes, you need to connect the upstream and downstream nodes to form a complete workflow. Otherwise, issues may occur during debugging and runtime. After the connections are made, you can manually drag the nodes, or click the [Optimize Layout] button in the Tools bar at the bottom to optimize the position of the nodes, making the workflow look clearer.
V. Debug and Publish
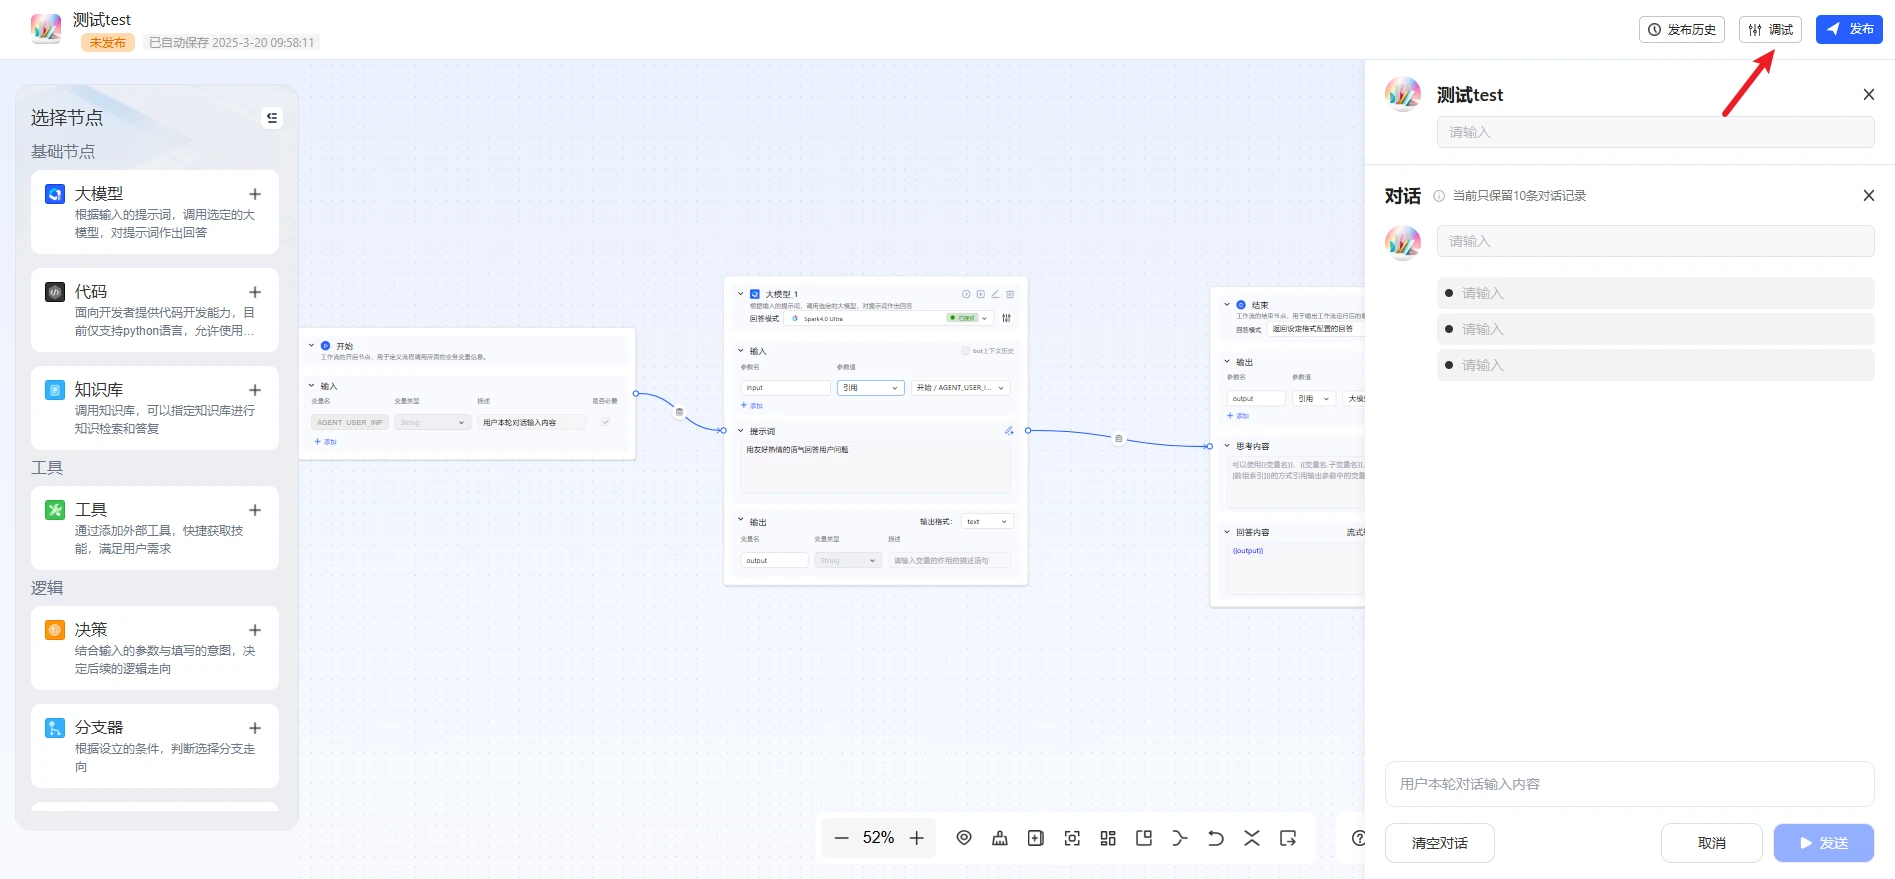
Click the [Debug] button in the upper right corner to run and debug the agent. After debugging is successful, click the [Publish] button in the upper right corner to publish the agent to the Xinghuo APP/Desk, WeChat Official Accounts, or provide it as a service externally via API.
The above steps demonstrate the process of creating a simple workflow containing only one node. In fact, the platform provides a rich variety of node types, allowing you to combine multiple nodes according to your needs to build more complex and useful workflows. The parameters and configurations of each node will be introduced in detail later.