
 Script Planner Assistant▸
 AI Apps
 AI News
WatermarkRemover-AI: An Open-Source AI Watermark Removal Tool
小编 ·

WatermarkRemover-AI: An Open-Source AI Watermark Removal Tool
What is WatermarkRemover-ai?
WatermarkRemover-AI is an open-source, practical AI watermark-removal tool. It uses Microsoft's Florence-2 technology to detect watermarks and the LaMA model to perform inpainting, effectively removing all kinds of watermarks. It supports both single-image processing and batch operations, delivers natural-looking repair results, and supports multiple output formats. It runs smoothly without requiring a GPU, and also provides a one-click installation script along with a simple and easy-to-use interface.
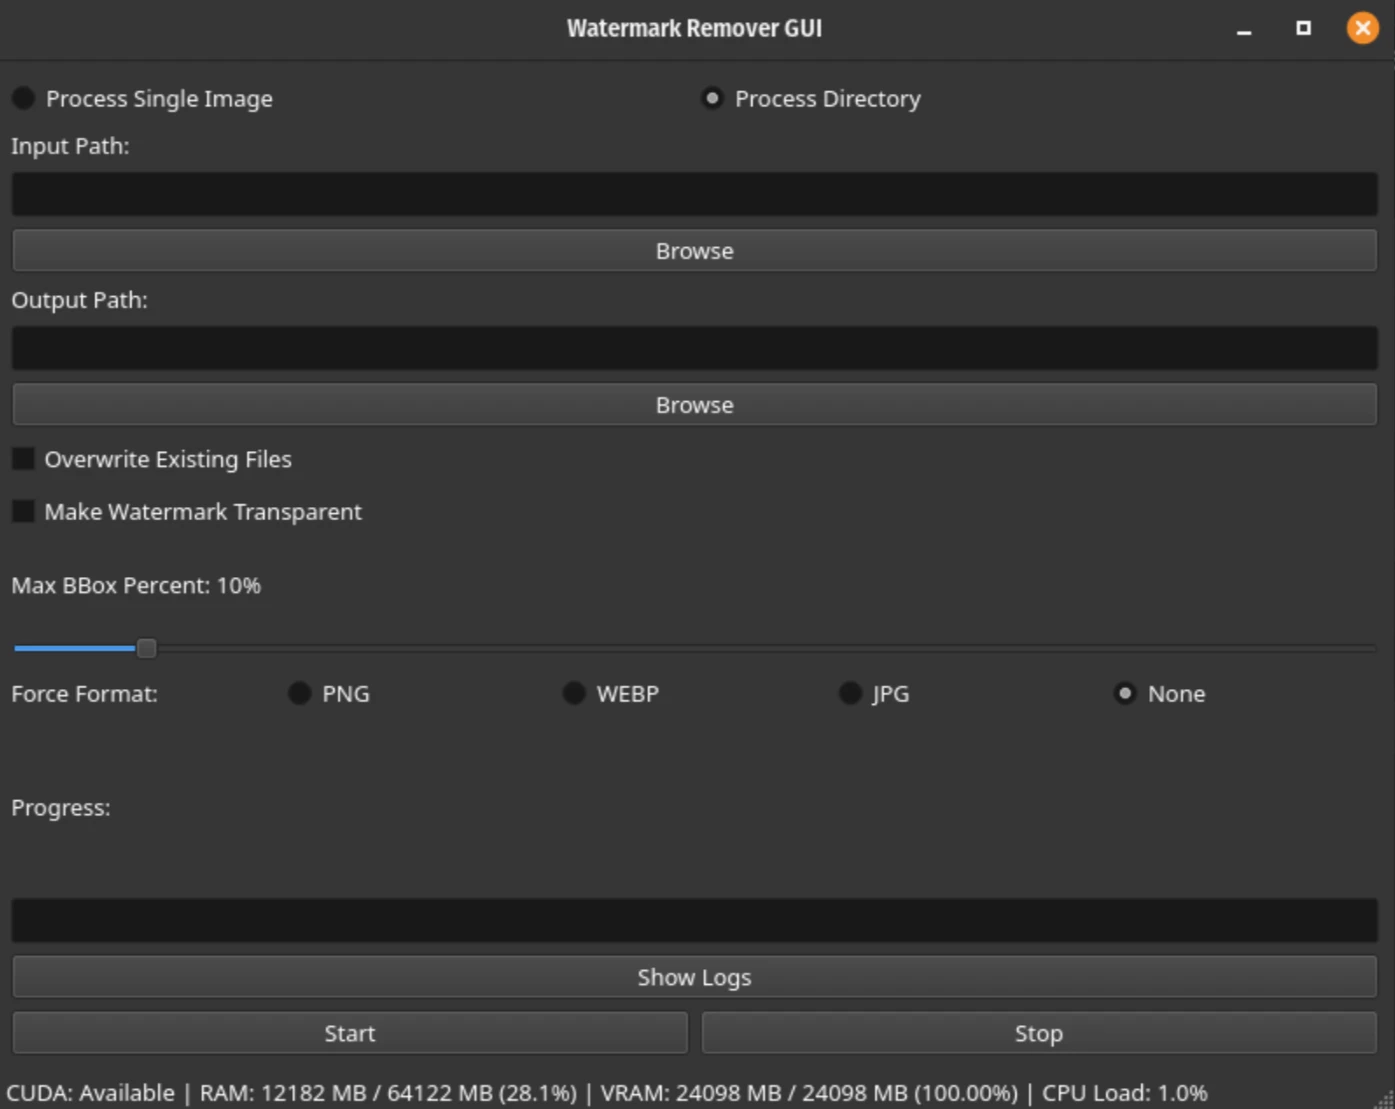
WatermarkRemover-AI Main Features
Dual-mode operation:
Supports processing a single image or images in an entire directory.
Advanced watermark detection:
Uses Florence-2's open-vocabulary detection capability to accurately identify watermarks.
Seamless inpainting:
Uses the LaMA model for context-aware inpainting, naturally filling in the areas where watermarks have been removed.
Customizable output:
The maximum bounding box size for watermark detection can be configured.
The transparency of the watermark area can be set.
Output can be forced into a specific format (PNG, WEBP, JPG).
Progress tracking:
Provides real-time progress updates in both GUI and CLI modes.
Dark mode support:
The GUI automatically adapts to dark mode based on system settings.
Efficient resource management:
Supports GPU acceleration using CUDA (optional).

WatermarkRemover-AI Technical Architecture
Florence-2: Used for watermark detection, identifying watermarks through open-vocabulary object detection.
LaMA: Used for inpainting, context-aware filling of areas where watermarks have been removed.
PyQt6: Used to build a user-friendly graphical interface.
How to Install WatermarkRemover-AI
Clone the repository:
git clone https://github.com/D-Ogi/WatermarkRemover-AI.git
cd WatermarkRemover-AI
Run the installation script:
Use the setup.sh script to automatically set up the environment, install dependencies, and launch the GUI application.
The CLI mode can also be used directly via the command line.
Manually activating the environment:
If you need to manually activate the environment, you can run:
conda activate py312aiwatermark
How to Use WatermarkRemover-AI
Graphical Interface (GUI):
After launching the GUI, you can choose to process a single image or an entire directory.
You can set the input/output paths and configure options (such as transparency, bounding box size, etc.).
Click the "Start" button to begin processing.
Command Line Interface (CLI):
Basic command format:
python remwm.py input_path output_path [options]
Common options:
--overwrite: Overwrite existing files.
--transparent: Set the watermark area to transparent.
--max-bbox-percent: Set the maximum bounding box size for watermark detection (default is 10%).
--force-format: Force the output to a specific format (PNG, WEBP, or JPG).
Example command
python remwm.py ./input_images ./output_images --overwrite --transparent --max-bbox-percent=15 --force-format=PNG
github: https://github.com/D-Ogi/WatermarkRemover-AI